KC14 guide
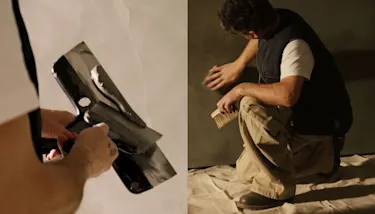
Preparation
You will need:
- Min. 2 filling knives (15–35 cm)
- Sandpaper, minimum grit 180
- Protective covering (paper/plastic and masking tape)
- A soft dust brush
- A microfiber cloth for DETALE Topcoat
- Dust mask and, optionally, gloves
Preparation
The surface must be even, dry and equally absorbent. Smooth out irregularities with a filler and prime the surface before applying KC14. Cover the area thoroughly to avoid unwanted stains, as DETALE Topcoat is difficult to remove. Sanding produces dust.
Step by step
Step 1
Set up masking tape around the desired area. Apply KC14 to the entire surface in one continuous process without interruption. Apply KC14 in a thin, even, and covering layer of approximately 1 mm thickness. Note that spot repairs and overlaps will be clearly visible in the final result. Remove the masking tape before KC14 dries and allow the surface to dry for a minimum of 16 hours.
Tip: The final expression depends on the application technique. Apply KC14 in soft, curved movements and avoid working in the same direction. Air bubbles may occur and are part of the natural finish.
Step 2
Sand down any ridges, irregularities, or uneven areas with sandpaper or a small filling knife before applying the second layer of KC14. We recommend using a sandpaper grit 180 for this step. Remove dust thoroughly from the entire surface using a soft dust brush. Set up masking tape again and apply the second layer of KC14 to the entire surface in one continuous process. The second layer must not be applied too thinly, as this increases the risk of sanding through the surface, which can result in visible darker areas. Remove the masking tape before KC14 dries and allow the surface to dry for a minimum of 16 hours.
Step 3
Ensure that the surface is completely dry before sanding begins. Cover the area thoroughly, including furniture, as sanding generates a significant amount of dust. Sand the entire plastered surface gently by hand in circular movements using grit 180–220 sandpaper, or finer, until the surface is smooth and even. Avoid sanding through the surface, as this will create clearly visible marks. Machine sanding must not be used. Remove dust thoroughly using a soft dust brush. Keep the protective covering in place for the next step, as Topcoat is difficult to remove from unwanted surfaces.
Step 4
Set up masking tape again. Apply Topcoat in two applications by dabbing it on with a microfiber cloth, with a minimum of 2 hours between layers. Complete the entire surface in one continuous process. Avoid visible runners, as these will be clearly noticeable. Allow the Topcoat to dry for a minimum of 2 hours, then lightly sand the surface with fine sandpaper to achieve a smooth finish. Remove dust using a damp cloth.
Tip: Reuse previously used sandpaper to achieve a finer finish. Apply Topcoat from bottom to top to minimise visible runners.
Explore our complete application guide and video tutorial for in-depth guidance and discover our Tips & Tricks collection of short videos covering best practices and application techniques.