KABRIC lamp

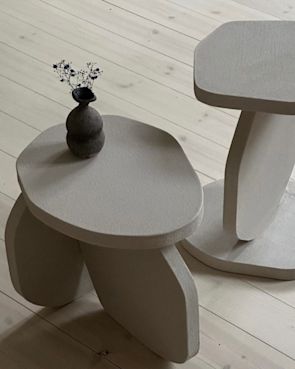
The creative Nanna Foyn Berg has made several DETALE projects over the years, including the beautiful, organically shaped dining table here. In this blog post, we will take you through the process of creating a DIY lamp with lots of personality, using KABRIC.
Having the vision in mind, inspired by an expensive table lamp she already had in her home, Nanna wanted to create her own version of it. A classic drink dispenser from IKEA would give her just the right dimensions – shape and the screw-top lid would be perfect for drilling a hole through and the dispenser tap was easy to screw off.

For this project, an old table lamp was pulled apart to reuse the lamp holder and cord, and put together to create the new lamp. To connect the lamp holder to the new lamp, a hole was drilled in the lid of the drink dispenser, before removing the tap and pulling the cord through the glass dispenser and the lid. Check to make sure that the lamp is working before you start applying KABRIC.
Now, time to give it a cool rustic look.

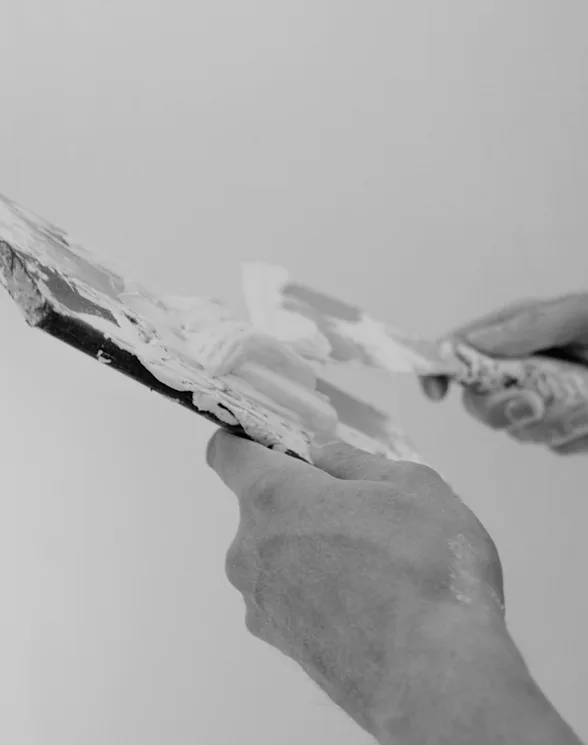
To even out the structure of the glass dispenser, Nanna chose to apply 5 layers of KABRIC Cava, switching between using a paintbrush and a filling knife, making sure to also cover the lid and the bottom of the lamp. To make the lamp appear rustic and worn, Hazel was dubbed onto a layer of dry Cava using a paintbrush.
Be patient and make sure to let each layer of KABRIC dry properly before you apply the next layer. Then, sand the entire dispenser with sandpaper grain 180 to make it nice and smooth. To make the lamp appear a bit more uniform and lighter in colour, the dispenser was “whitewashed” with a wet cloth dabbed in KABRIC Cava.
“The result was better than I expected. I do a lot of DIY’s but this one is probably my most creative one and the best result.”

When the lamp is completely dry, DETALE Topcoat or Strongcoat is applied to seal the paint and make it more durable and washable over time. Then you are ready to assemble the lamp and enjoy the result of your DIY project.
Watch the entire process on Nanna’s Instagram profile under the highlight ‘Lampe DIY’. You can also see how Nanna created her own DIY dining table, in a beautiful organic shape below.